
Information security has been top-of-mind for many asset managers lately. From cybercrime to client data regulations, encryption technology is playing a greater role in the asset management space. To aid our customers, Eze has been striving to provide support in this space, and that includes TLS encrypted FIX traffic. This ensures that we can work with any FIX engine, and comply with the latest security standards.
To achieve this, let’s explore how to work with stunnel, which is a freeware and widely used TLS proxy. Stunnel allows an application that does not provide encrypted traffic by default to tunnel its traffic through, and broadcast the traffic encrypted.
Fundamentals
Before we dive deep into what stunnel is and how to configure it, let's review some of the basics.
- Encryption: Encryption is the encoding of a message to an unreadable format. The expectation is that the receiver of the message will be able to decrypt the message via a given key to a readable form. It's a simple explanation, but it is in the heart of the complex world of SSL/TLS. Many of our connections on the internet are unencrypted, and there is a movement to encrypt more and more of them. For example, WhatsApp is one of the more recent applications that has made its application's traffic encrypted by default in the past few years.
- TLS: Stands for Transport Layer Security, which is the protocol to secure network communication. It is also referred to as SSL (Secure Socket Layer). The latest version of TLS is 1.2. It can be found here, here, and here.
- SSL Certificate: A certificate that authenticates an organization and is used to provide an encrypted connection to a server. See this article and this one here.
- OpenSSL: The de facto command-line tool that creates a CSR (Certificate Signing Request) to secure websites and web servers. See here and here. To truly use OpenSSL, it should be accessed from a Linux/Unix environment, including Cygwin (https://www.cygwin.com/) on Windows. Note that if you already have Git Shell for Windows installed, you have a BASH emulation environment and, therefore, OpenSSL is already installed.
- stunnel: A secure-based proxy that is used to accept unencrypted data and transmit it securely to an intended location. See here.
So How Does It Work?
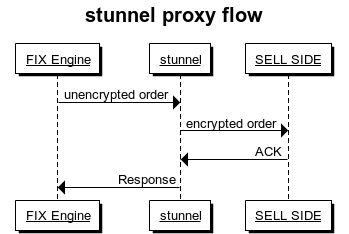
Here is a basic stunnel flow that very simply depicts the flow described above, where the sell-side application will get the order encrypted regardless of whether the FIX app that the traffic is originating from supports encryption:
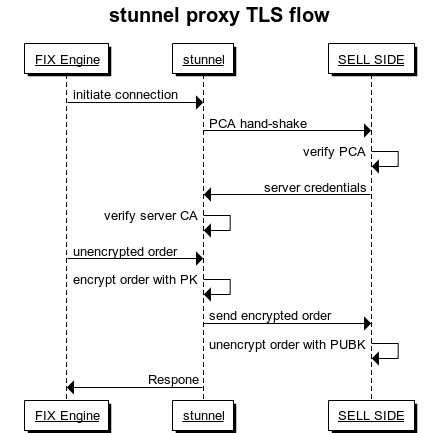
A More In-Depth Flow, with the TLS Detailed
This figure shows a general flow of how the TLS works with the server proxy. There are references to a public certificate (PCA), Certificate Authority (CA), Private Key (PK), and Public Key (PUBK):
Setting Up Certificates
To start using SSL, we'll need to generate a certificate. If you haven't done so, please get your hands on an OpenSSL, as mentioned above. There are Windows tools for this, including for doing this via IIS, however, using Open SSL is the most open and standard tool to generate certificates – by using the Git shell:
$ openssl req -x509 -nodes -newkey rsa:2048 -keyout pr_cert.pem -out pub_cert.pem -days 365
Note that there are two certificates generated:
- the "keyout" pr_cert.pem certificate is the private key
- the "out" pub_cert.pem certificate is the public key
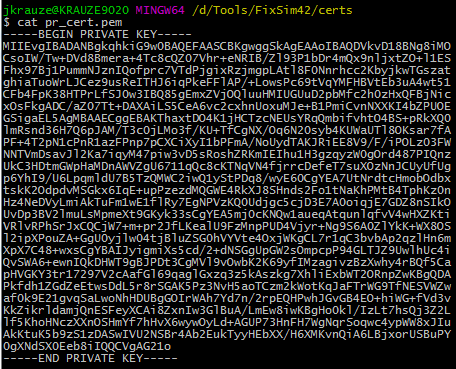
Go ahead and open the files to just get an idea of how they look inside (please note that you should never share the private key):
Setting Up Stunnel
Now that we we've gone over the basics, download stunnel and extract to a local directory. Within that directory, there should already be a stunnel.conf file. Copy a backup, open the original, remove all tags, and you should have something along the lines of:
; *****************************************************************************
; * Global Options                                                            *
; *****************************************************************************

debug = 7
output = ..\logs\stunnel.log
;sslVersion = all
sslVersion = TLSv1.2
options = NO_SSLv2
options = NO_SSLv3
socket=a:TCP_NODELAY=1
socket=r:TCP_NODELAY=1
client=yes

;********** client
[TEST]
cert=D:\Tools\FixSim42\certs\pub_cert.pem
accept=127.0.0.1:40443
connect=127.0.0.1:11001
Note:
- The SSL version is set to be TLSv1.2, which is the latest version as of this writing. The latest will always be the recommended version, however, it is possible to change it to a lower version.
- The debug level is set to 7 for testing purposes only. For production, it will be up to you to decide what’s best.
To start stunnel, let's install it as a service:
D:\Tools\stunnel\bin>stunnel.exe -install
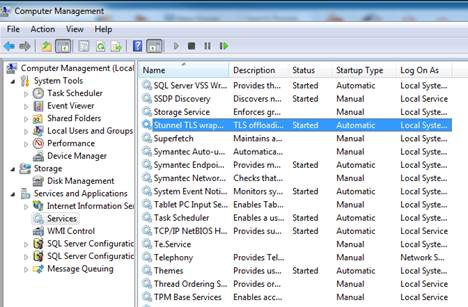
Go to the services in Computer Management and start it up.
Stunnel can now be run from Services and Applications in Computer Management:
Once it's running, open the log file from \logs\stunnel.log to monitor it.
FIX Simulator
For testing, we used our in-house FIX simulator based on FIX8. A general link by FIX8 here (registration is required).
There are many options for setting up the SSL session in FIX8. We'll concentrate on the basic one, where we just need a private certificate. In the FIX8 simulator configuration file, create an SSL context:
<ssl_context name="ssl1"
private_key_file="certs/pr_cert.pem">
</ssl_context>
The next simple step is to just include the context in the default tag under FIX8:
<?xml version='1.0' encoding='ISO-8859-1'?>
<fix8>
<default role="acceptor"
fix_version="4200"
heartbeat_interval="10"
ip="127.0.0.1"
session_log="session_log_file"
protocol_log="protocol_log"
tcp_recv_buffer="100663296"
tcp_send_buffer="100663296"
tcp_nodelay="true"
reset_sequence_numbers="false"
ignore_logon_sequence_check="true"
permissive_mode="false"
process_model="threaded"
enforce_compids="false"
silent_disconnect="false"
ssl_context="ssl1"
persist="redis0"/>
<session name="ORG"
port="11001"
active="true"
sender_comp_id="ORG"
target_comp_id="ORG1"/>
<ssl_context name="ssl1"
private_key_file="certs/pr_cert.pem">
</ssl_context>
<!----------------------------------------------------------- more unrelated tags that are part of the standard FIX8 XML configuration file ----------------------------->
I hope that this was an educational post where you had the opportunity to learn how to support new secure standards with freely and openly available tools without having to redesign or refactor your current application stack. To get more practical tips, or to learn more about Eze Software, please subscribe to the blog using the form to the right.
To learn about Eze Software's award winning investment suite, click here: